Admin Tutorial Hands on: Create an Application with Advance Input Components
- Section covered;
Getting Access
- Log into TestDrive Portal
- First, you'll need a user account. Create an account using your existing institutional login through CILogon.
- After you've logged in, an administrator will grant you access to create the test application DetectCovid.
- When you log in for the first time you will be in the 'Workspace'. Switch to 'Settings'
- 'Settings' is the admin space of the gateway. Here the first is "Application Catalog"
NOTE: the purpose of this hands on is to demonstrate some of the advance application input options available in the gateway.
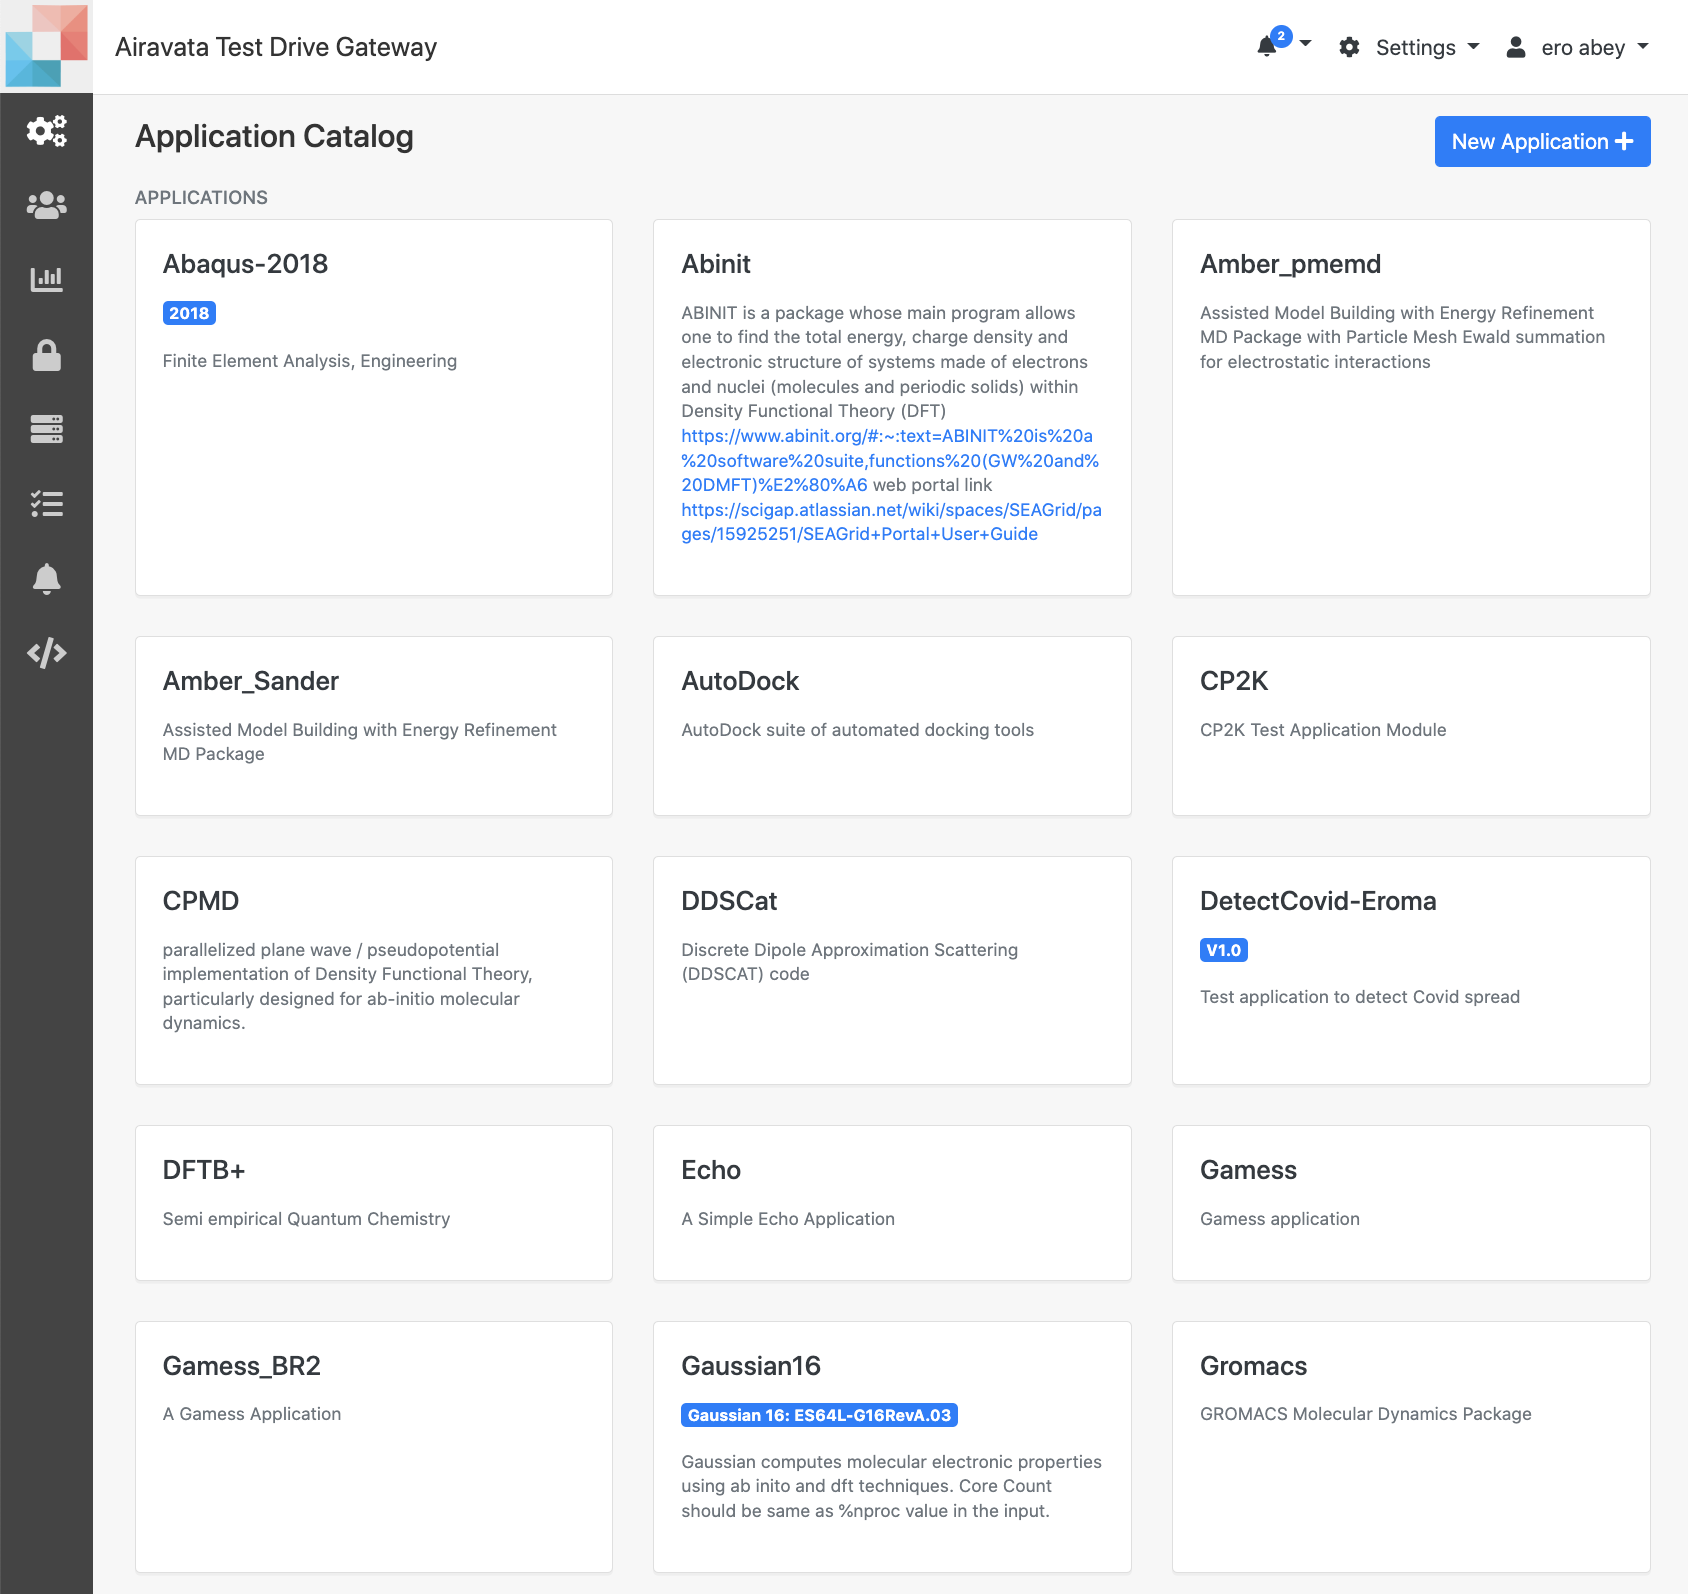 Image: Application Catalog
Create New Application "DetectCovid"
- Application Catalog is where all the available applications are listed as well as the option to create new.
- Use New Application+ to create new application.
- In the 'Details' tab provide the name, version and description.
- Application Name: DetectCovd-Peter
- Application Version: V1.0
- Application Description: Test tutorial application to detect Covid spread
-
For Application Name provide
DetectCovid-<your name>. Appending your name will allow you to distinguish your version of DetectCovid from other users.
e.g. DetectCovid-Peter
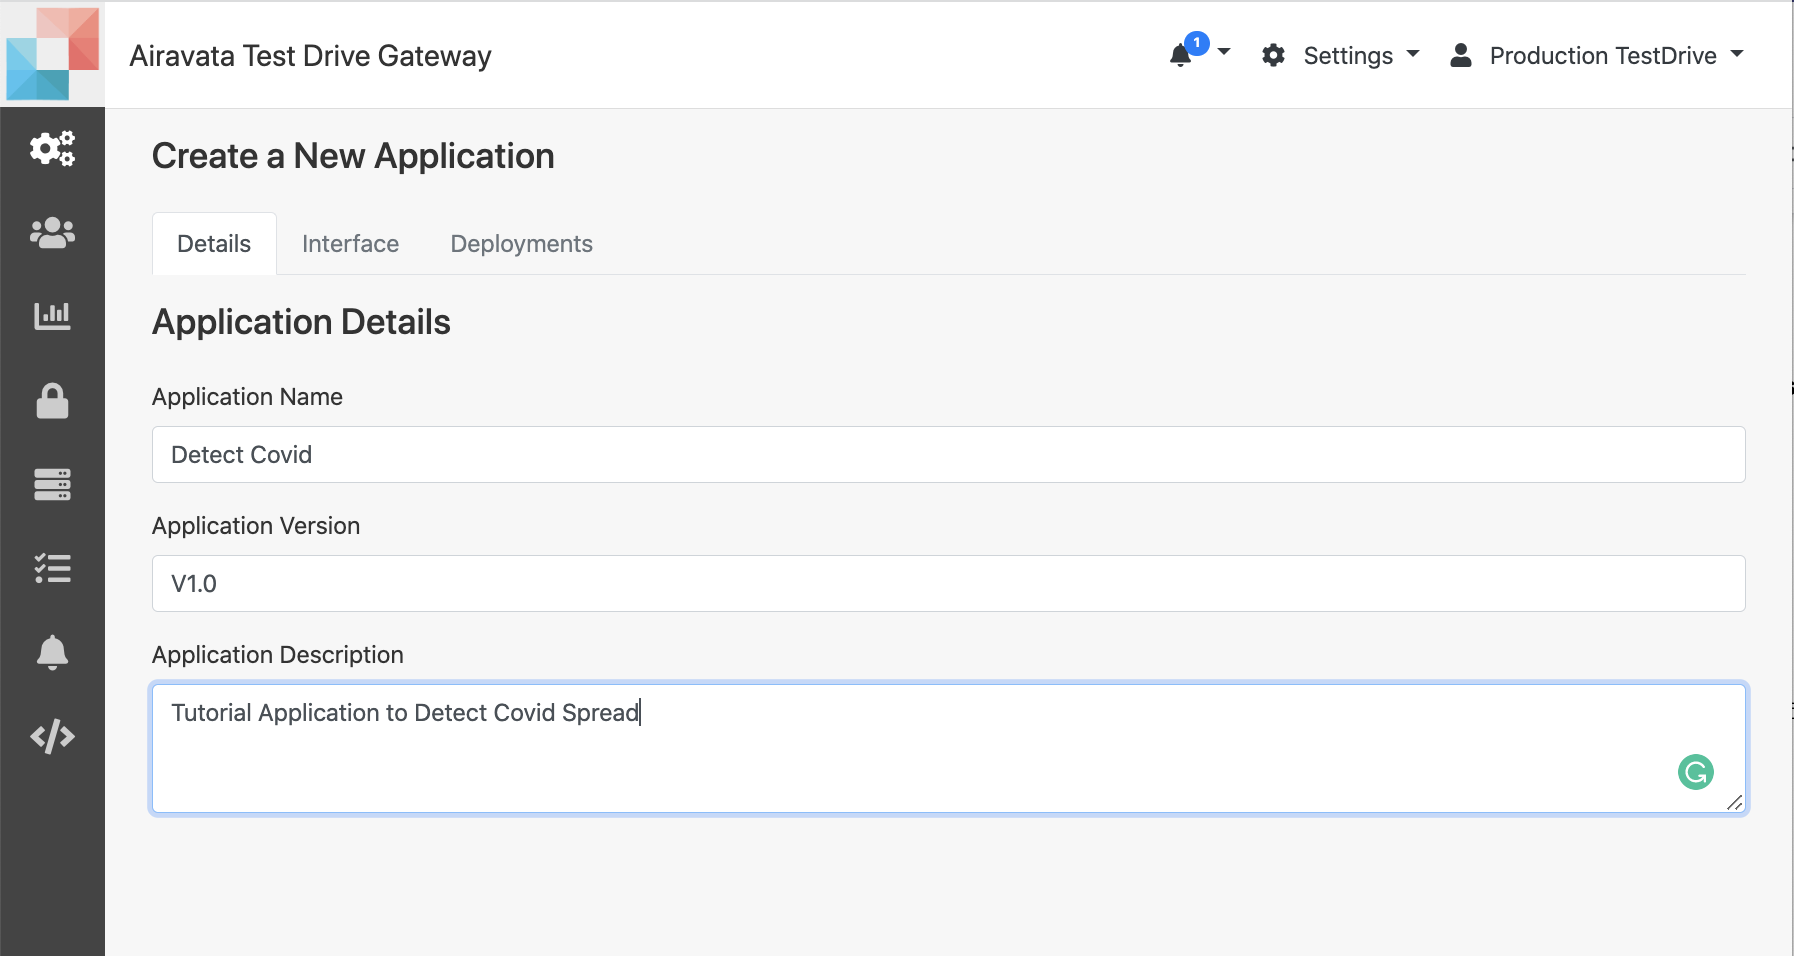 Image: Application Details Tab
-
Upon saving the Details users can add Interface and Deployment of the application in respective tabs.
Add Application Interfaces
- Click on the Interface tab.
- Click button, Add application input.
-
Add the first Application Input
- Name: Vaccination Status
- Type: String
- Initial Value: Yes
- Application Argument:
-v - User Friendly Description:
Add your Vaccintion Status - Required on Command Line:
True - Required:
True - Read Only:
False
-
Add the second Application Input
- Name: Symptoms
- Type: String
- Initial Value: a
- Application Argument:
-s - User Friendly Description:
Select all your symptoms - Required on Command Line:
True - Required:
True - Read Only:
False - Advanced Input Field Modification Metadata:
{
    "editor": {
        "ui-component-id": "checkbox-input-editor",
        "config": {
            "options": [
                {
                    "value": "a",
                    "text": "Cough"
                },
                {
                    "value": "b",
                    "text": "Fever"
                },
                {
                    "value": "c",
                    "text": "Shortness of Breath"
                },
                {
                    "value": "d",
                    "text": "Loss of Smell"
                 }
            ]
        }
    }
}
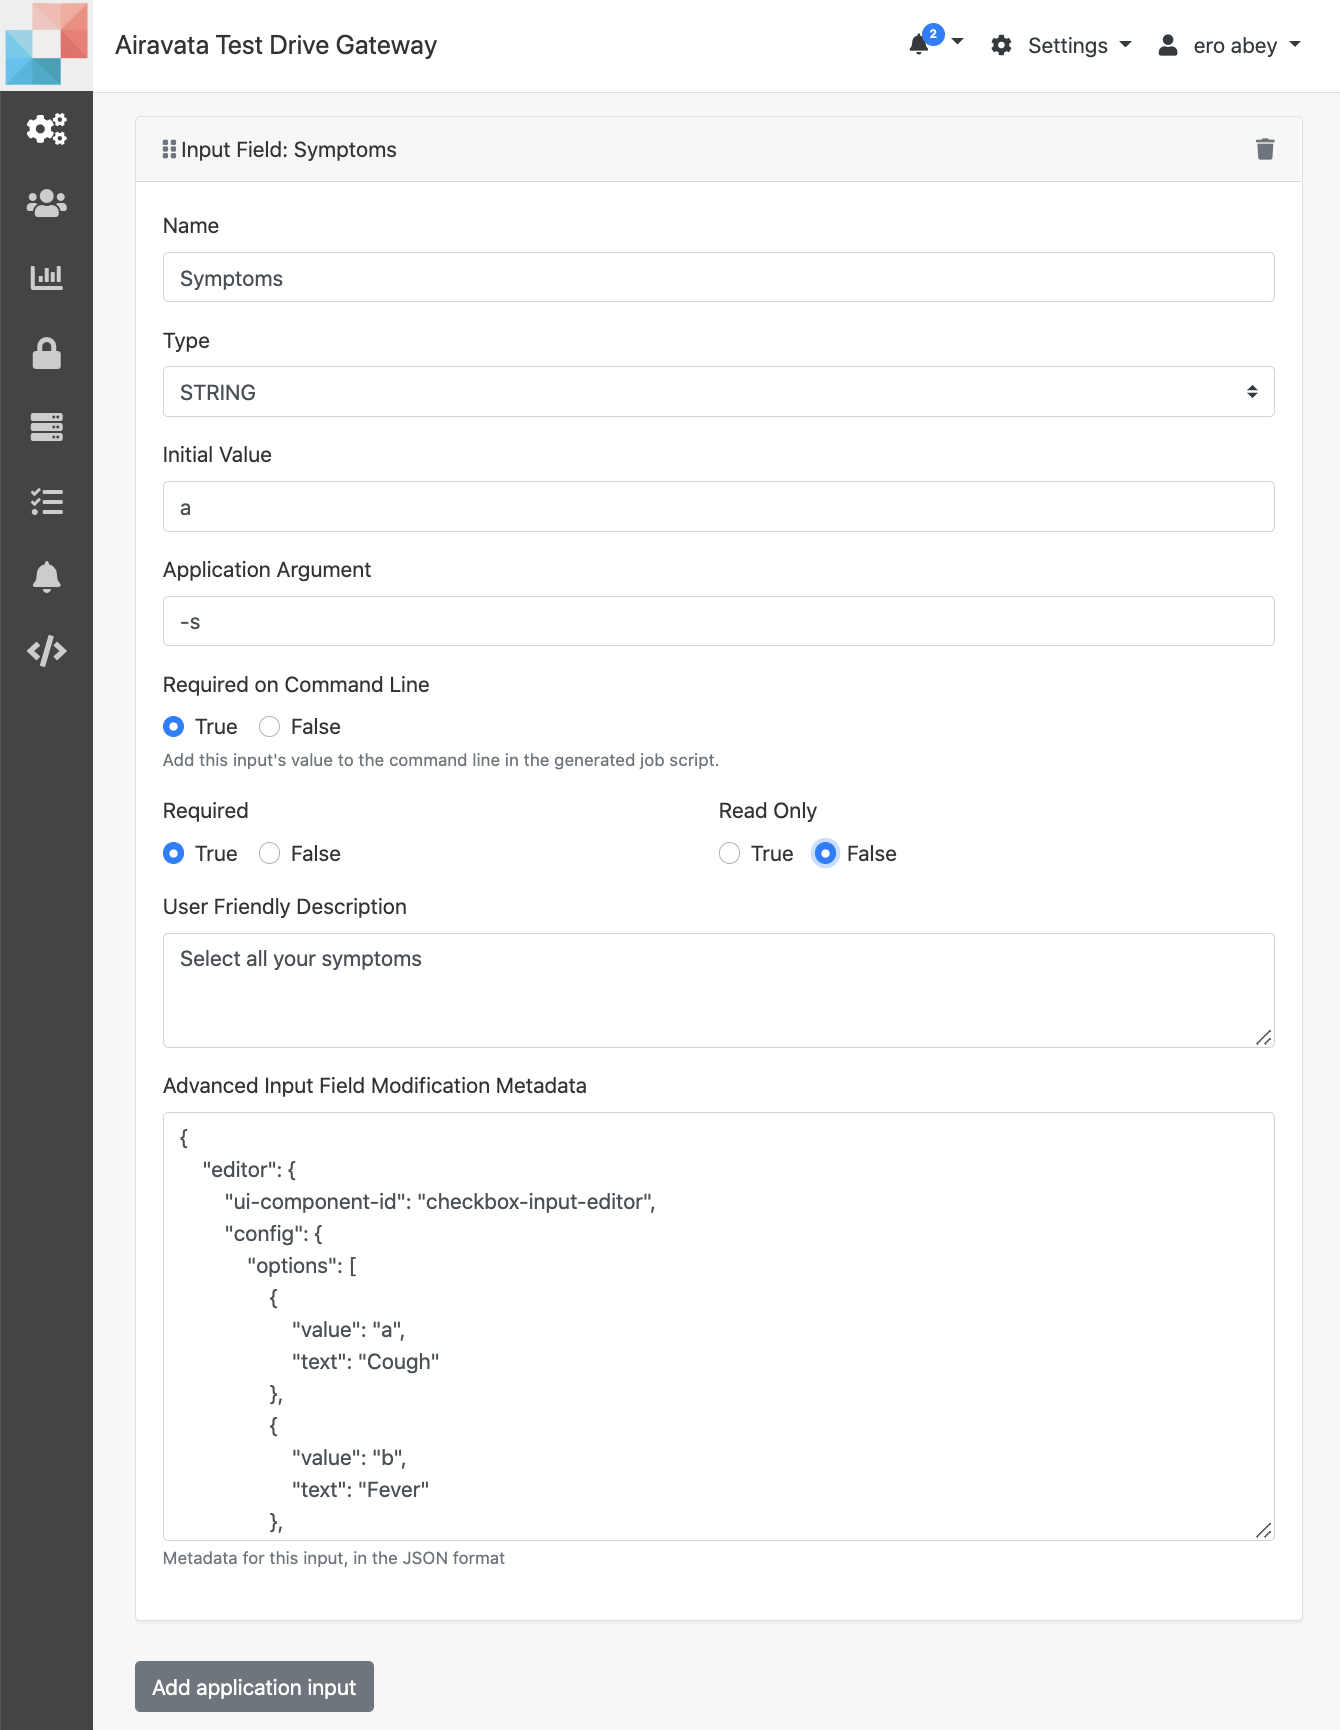 Image:DetectCovid Checkbox Input
- Add the third Application Input
- Name: Last Location
- Type: String
- Initial Value: main
- Application Argument:
-l - User Friendly Description:
Select your last location - Required on Command Line:
True - Required:
True - Read Only:
False - Metadata
{
    "editor": {
        "ui-component-id": "radio-button-input-editor",
        "config": {
            "options": [
                {
                    "value": "lobby",
                    "text": "Lobby"
                },
                {
                    "value": "loft",
                    "text": "Loft"
                },
                {
                    "value": "main",
                    "text": "Main"
                }
            ]
        }
    }
}
- Add the last Application Input
- Name: Crowd Size
- Type: String
- Initial Value: 50
- Application Argument:
-cd - User Friendly Description:
Select the crowd size of the location - Required on Command Line:
True - Required:
True - Read Only:
False - Metadata
{
    "editor": {
        "ui-component-id": "slider-input-editor",
        "config": {
            "min": 0,
            "max": 200,
            "step": 10,
            "valueFormat": {
                "percentage": false
            },
            "displayFormat": {
                "percentage": false
            }
        }
    }
}
- In the interface tab, you can also add any output you explicitly wants to bring back from the remote resource and make available for the gateway users to download, for this tutorial, we will not be adding outputs.
- After you added all the above inputs, the experiment creation page would look like below;
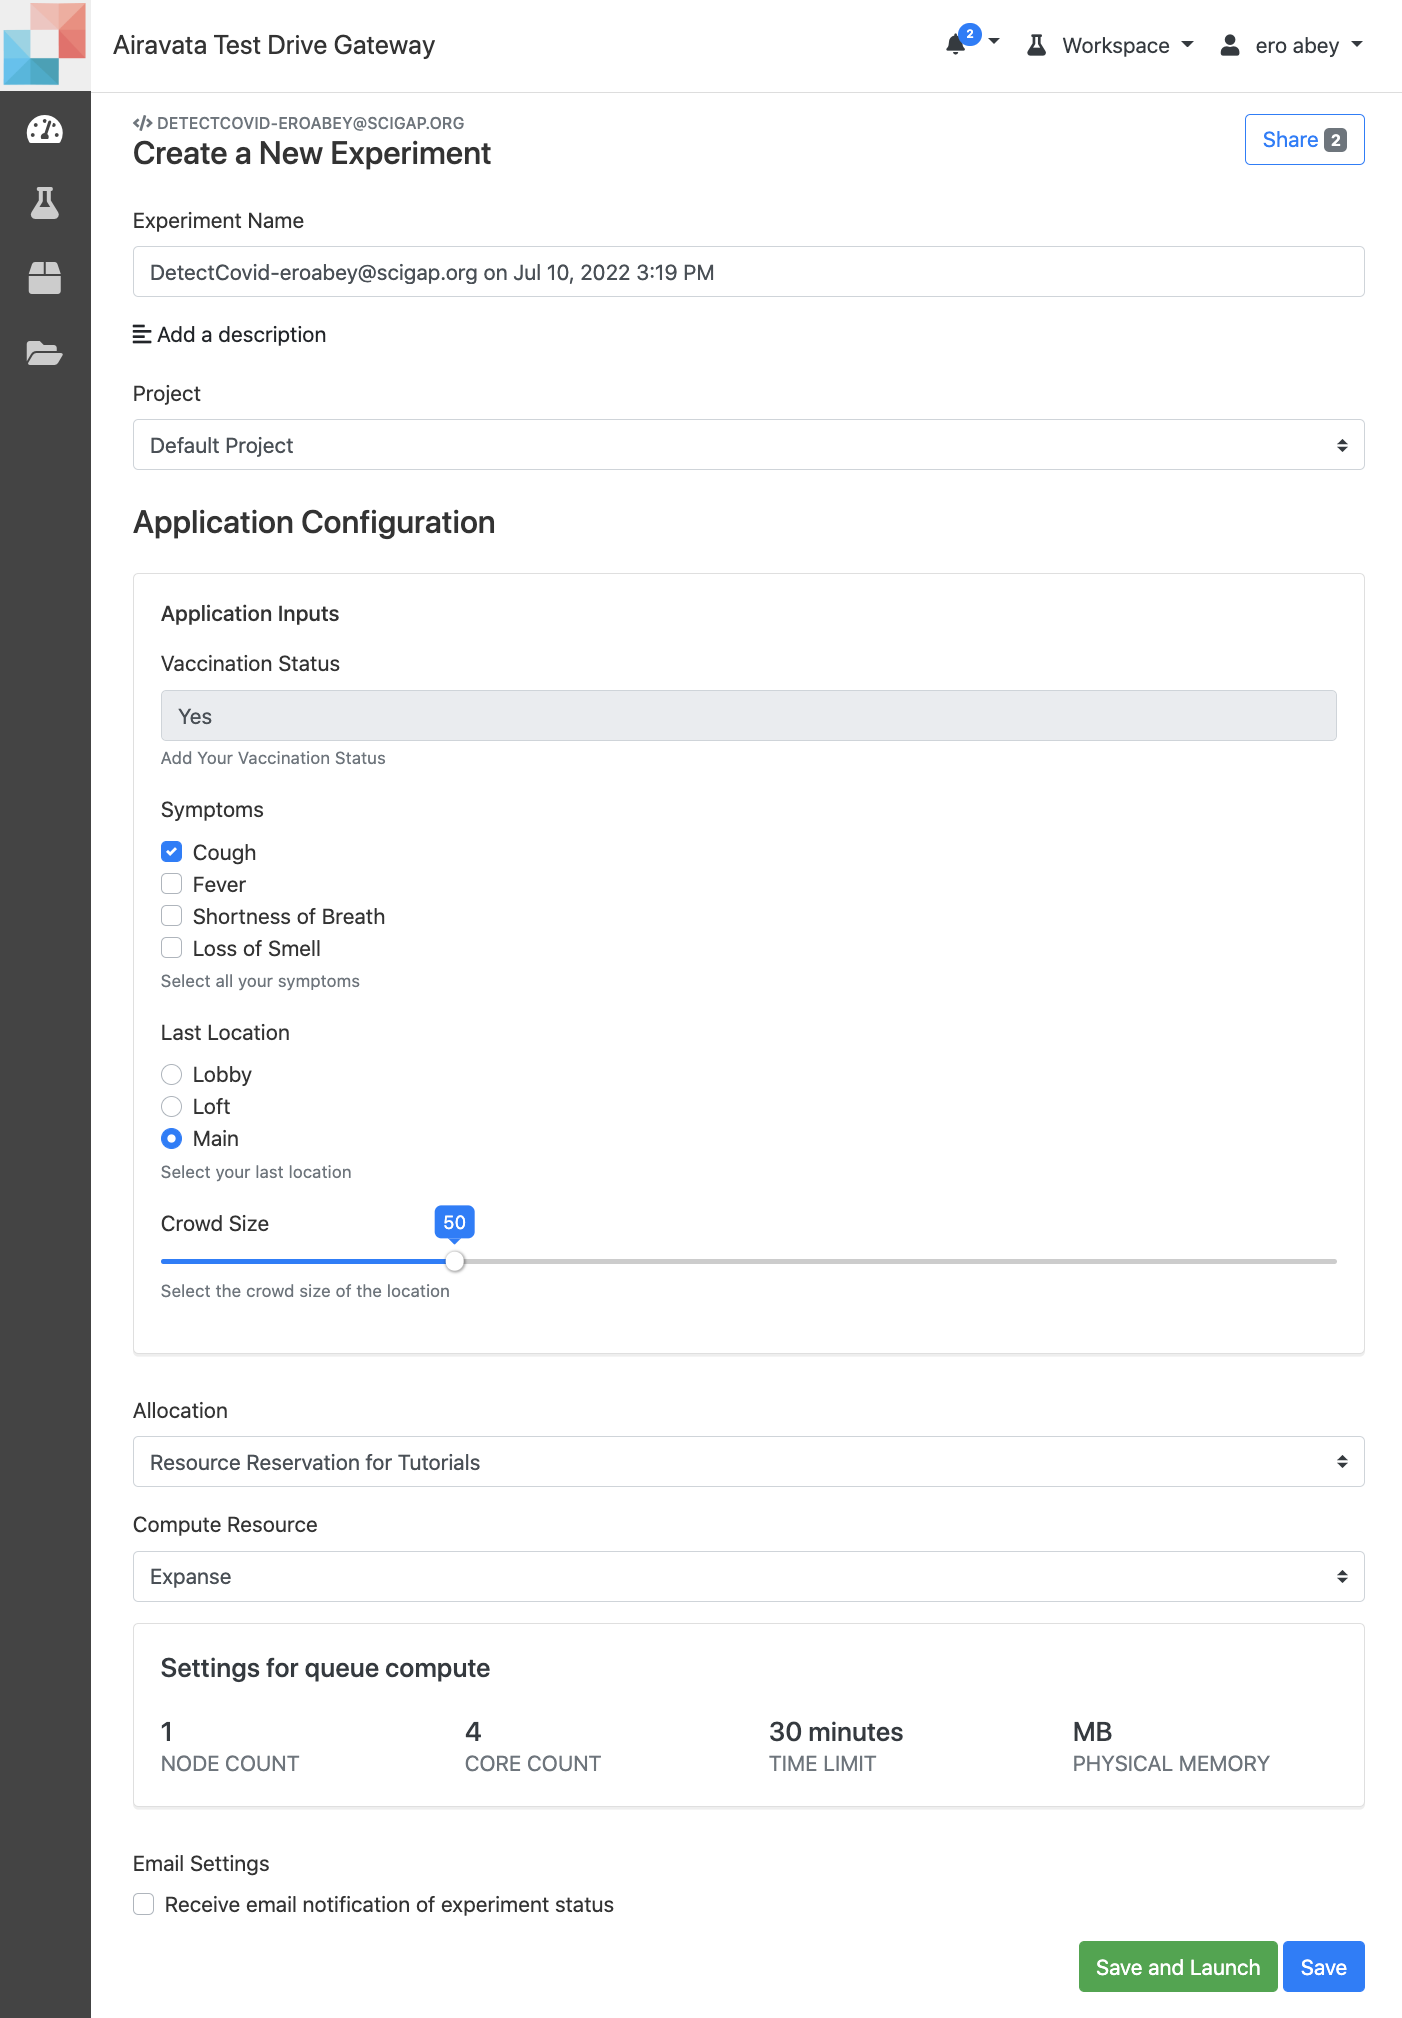 Image:Create DetectCovid Experiment
Add Application Deployment
-
The Application Deployment is where we add command to execute the computation in a specific remote computational resource.
-
Choose Expanse as the compute resource.
-
For this tutorial, In the Deployment tab, as the executable path add
\executable path -
Ignore rest of the fields and save.
-
NOTE: This application is purely to demonstrate the application input options and not to actually submit and run on a resource.